Climate stripes are data visualization graphics that use coloured bands to show long-term temperature trends. Created by Ed Hawkins at https://

Sometime this year our friend Jie Hui had the idea to translate these climate stripes into a wearable form, to act as conversation starters on how the climate is changing. Winnie then had the idea that they could be made into friendship bracelets.
As someone new to friendship bracelets, it wasn’t easy to find a way to weave the stripes, but we hope that with what we have learnt, it becomes a bit more straightforward for you.
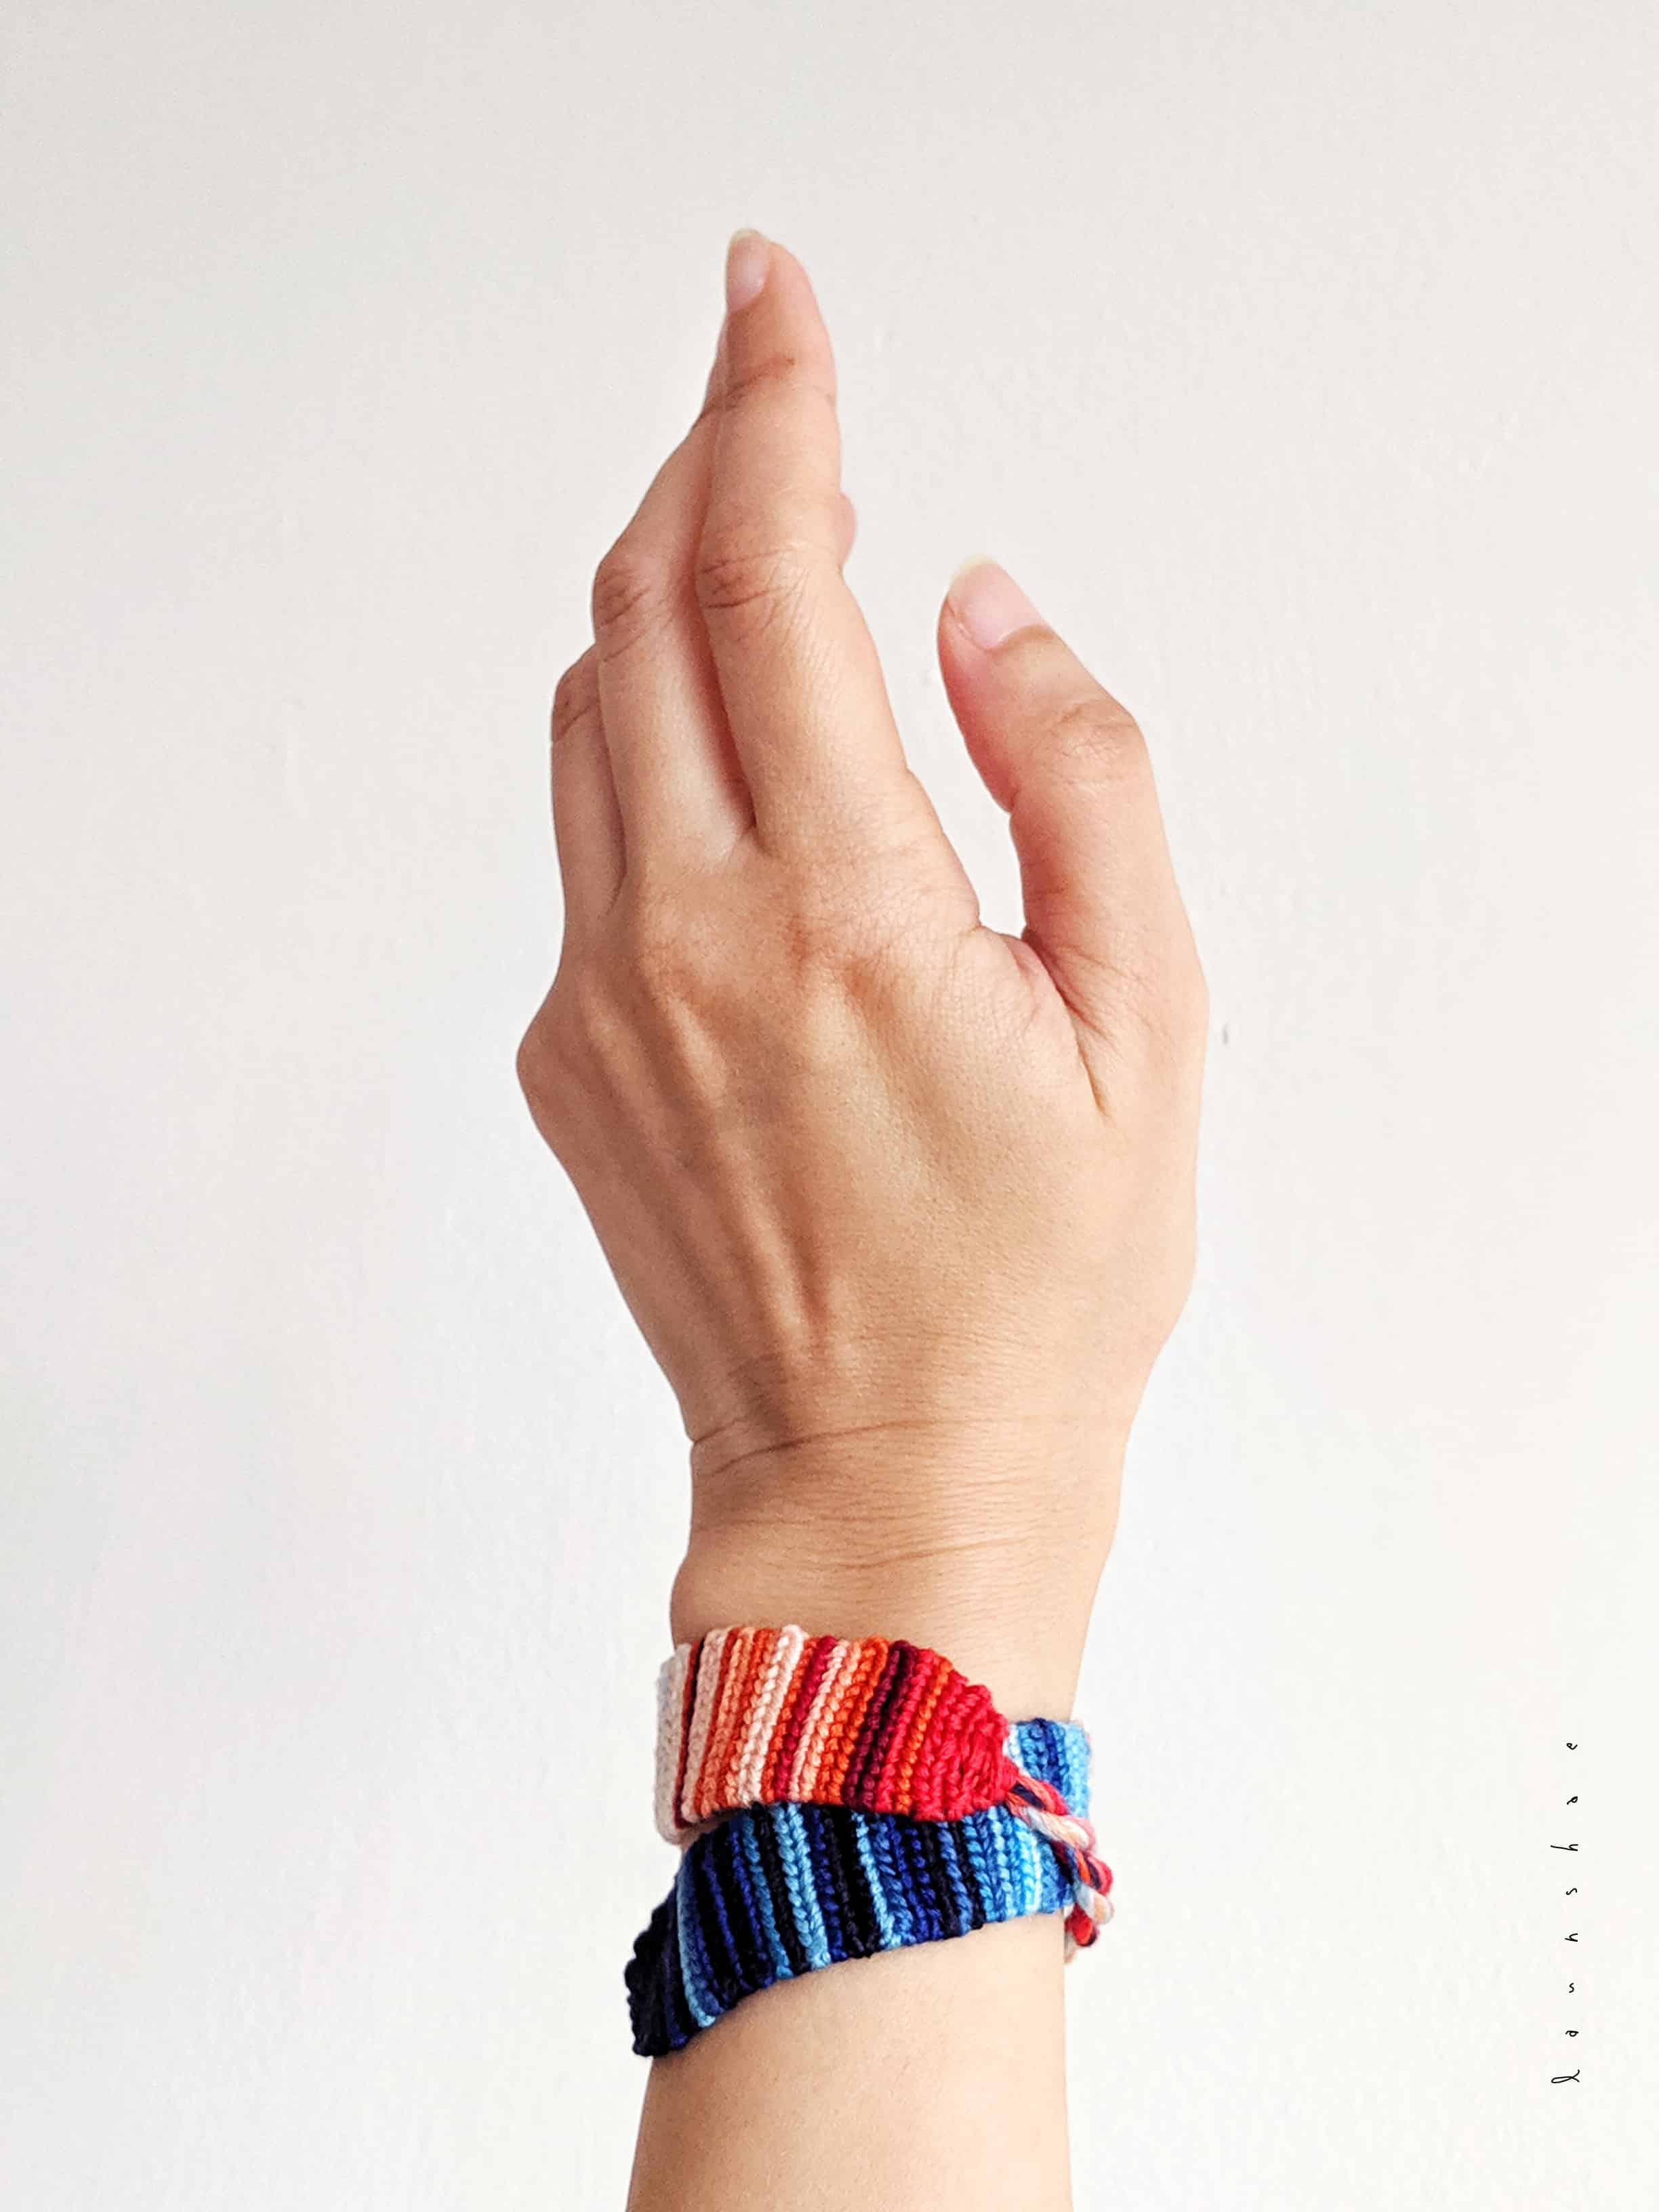
This is what we came up with:
And here’s how you can create your very own bracelet!
1. Data prep
- Find the climate stripes graphic for your country or area of interest from https://showyourstripes.info. Most graphics will have 118 stripes – one for each year of data measured.
- Use an app with a colour picker such as Photoshop, to determine the colour of each stripe. There should be 16 colours in total. 8 shades of blue and 8 shades of red. A spreadsheet app such as Google Sheets is useful to jot the information.
- If you’re interested to make one based on the Singapore data, below is the breakdown, and here is its source Google sheet – which could also be a useful starting place for your adaptation. The top right section acts as a legend to mark out the colour of each row using RGB hex.

2. Learning the basics of bracelet making
- If you are totally new to friendship bracelets like I was, check out this great introductory video by Masha Knots to learn some basics such as how to make a knot. A big thank you to Masha for her wonderful videos, so I was able to pick up these basics without too much of an ordeal.
3. Materials prep
- Gather the 16 colours of leading embroidery thread (‘Leading’ as opposed to ‘base’. ‘Leading’ are the colours that are visible after knotting. ‘Base’ are the inner support threads that will be hidden after knotting.). In the top right section of the breakdown above are suggested embroidery thread colours that can be used from DMC. You could also choose to swap any of them out if you already have some colours. The key is to ensure the colour tones look distinct enough so the pattern shows up clearly when woven.
- Prepare 12 base threads (the more base threads you have, the wider the bracelet). The colours of the base threads don’t really matter as they will be covered by the leading threads, they are only visible in the ties on both sides. However I did try to use colours within the spectrum of red to blue because they look pretty and cohesive as the ties.
- It could also be useful to have a big cardboard and a clip to peg the bracelet to while working on it.
4. Now you are ready to begin!
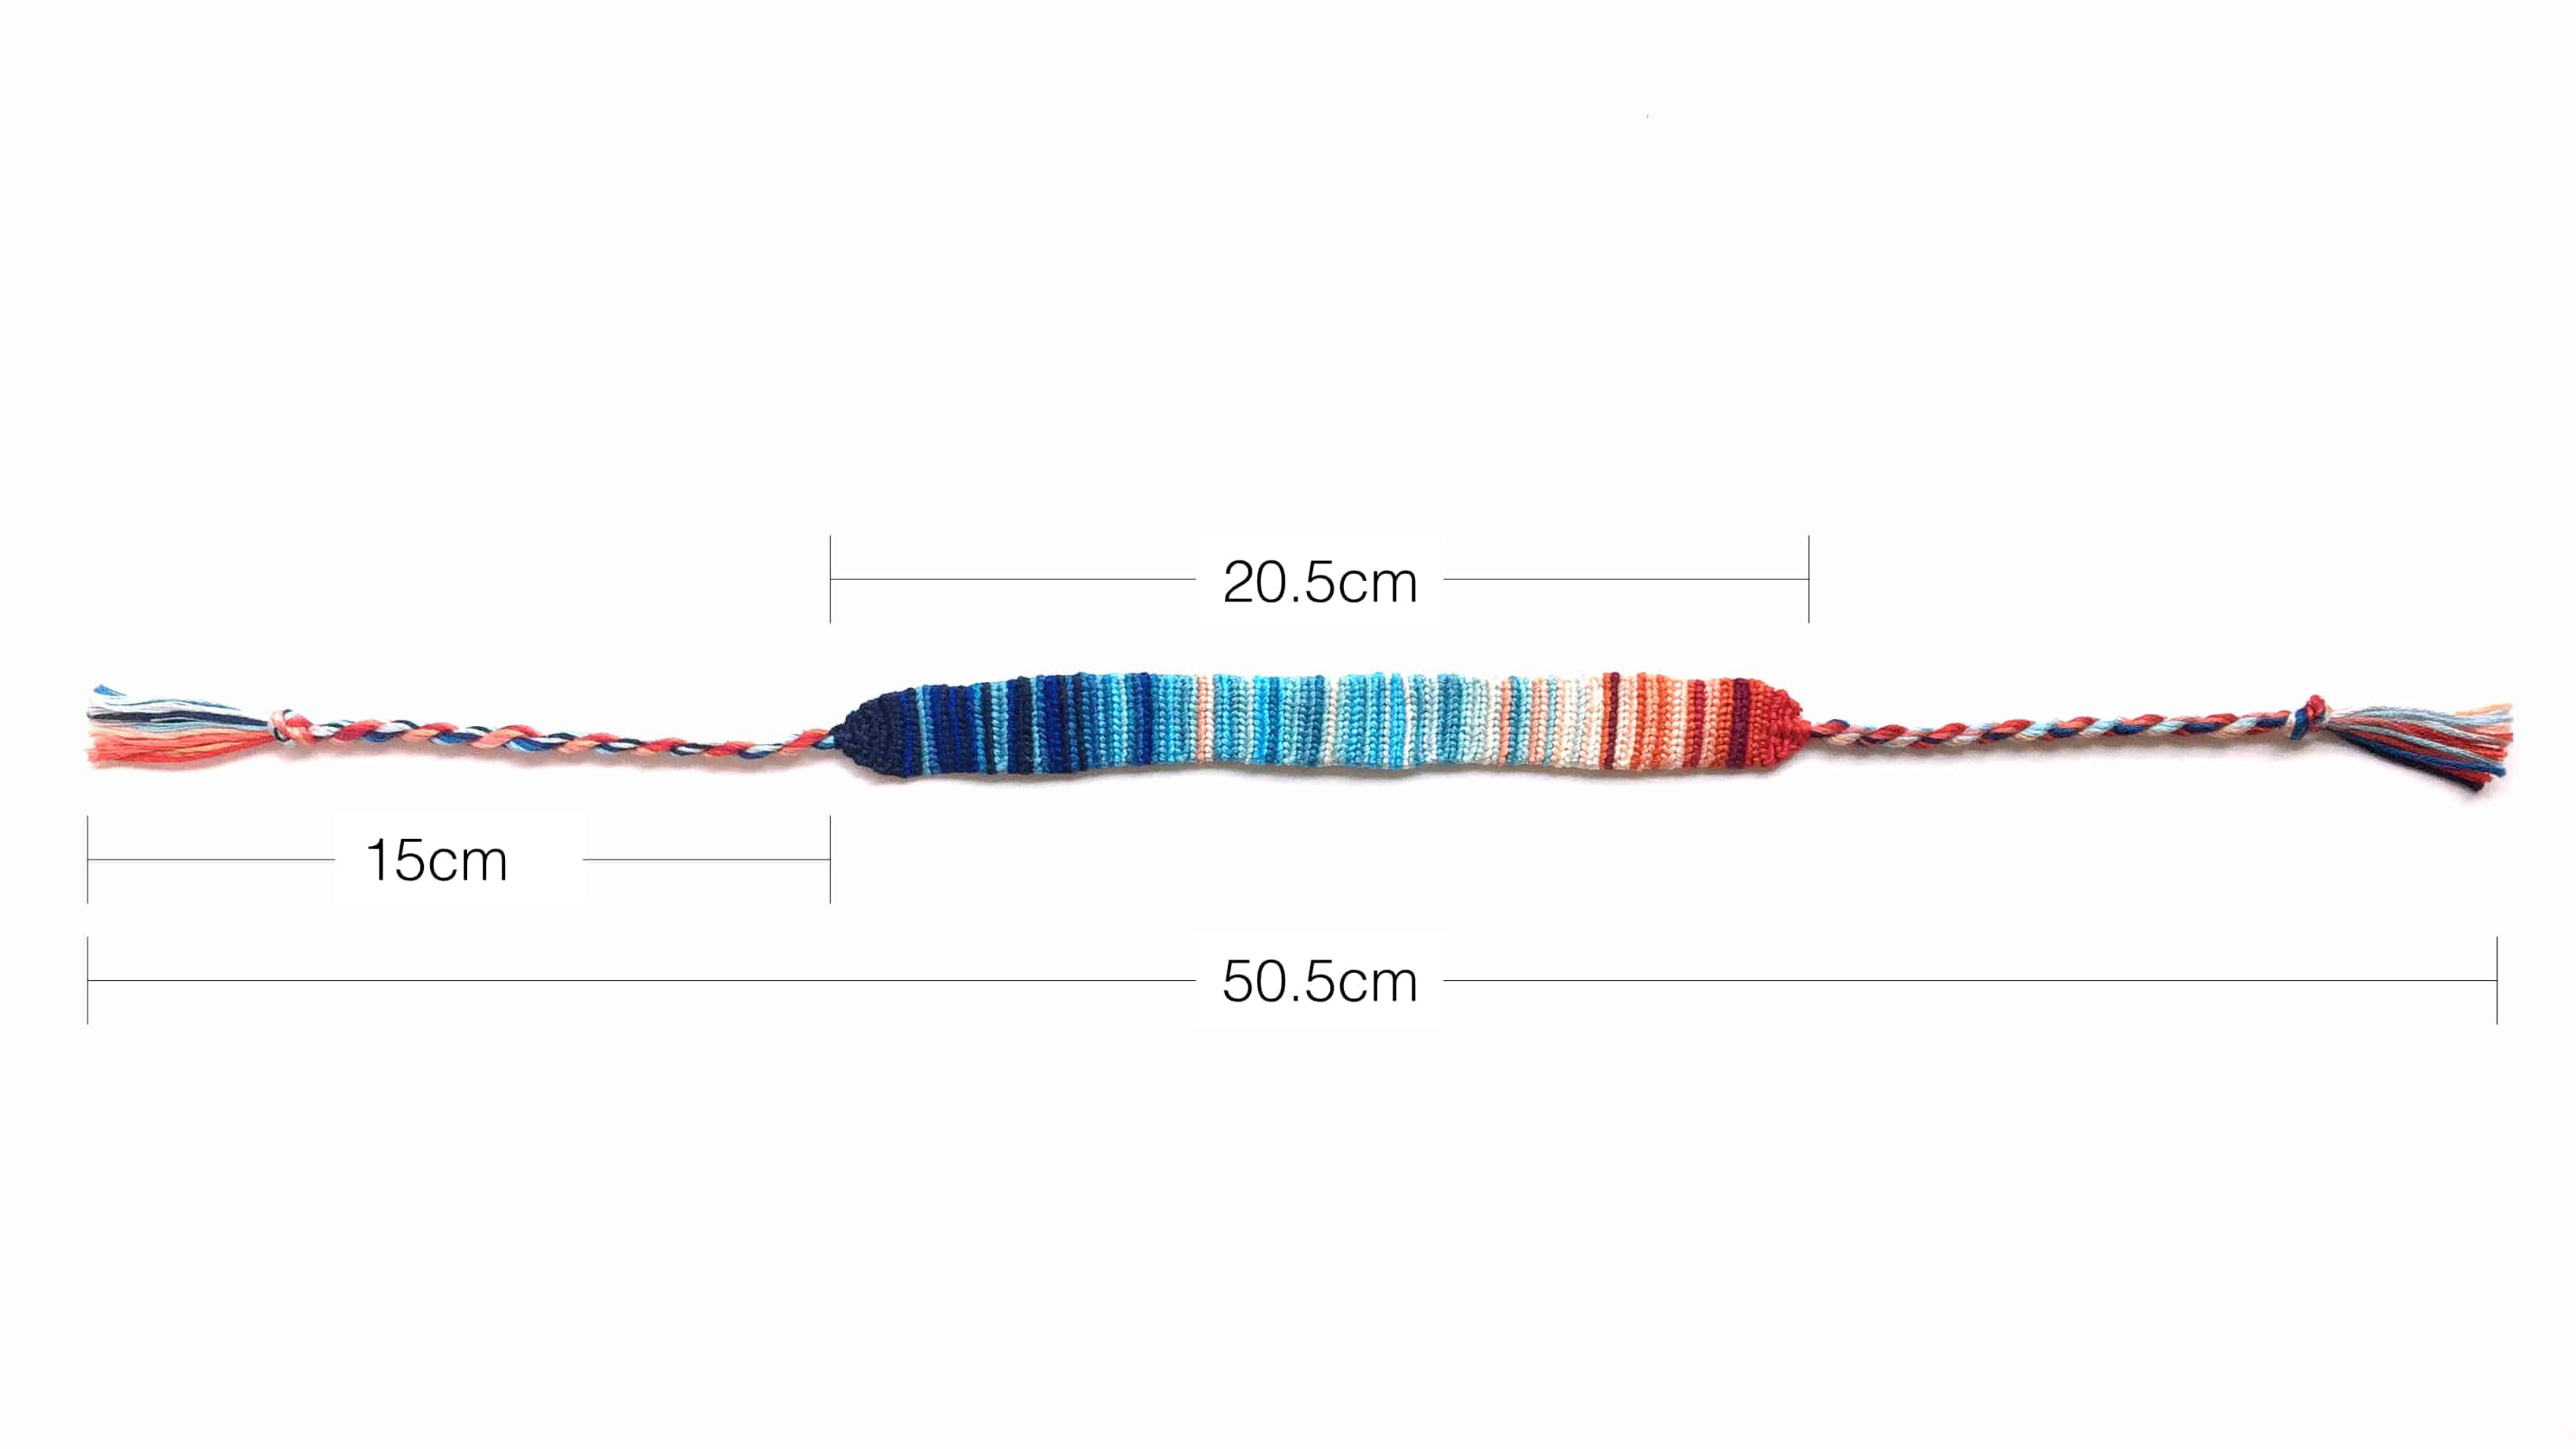
- Cut the 12 base threads to a length of about 60 – 70cm, depending on how long you like your ties to be.
- Gather all the 16 leading threads together and label them for easy readability. I didn’t cut mine from the bunch because I wasn’t sure how much length would be needed.
- Start by making a triangle end – Masha’s how-to video here. I like to start with a dark blue and end with red on the other side to emphasize the warming effect.
- Tip: I bundled the dark blue thread for the first triangle end in together with the base threads so that I wouldn’t have to tie it in at the top of the bracelet, which would result in a stub at the top underside of the bracelet. Similarly I bundled the red thread for the other triangle end into that end of base threads so I wouldn’t create a stub at the end.
- Use the alpha method to knot row by row from left to right and right to left (or vice versa). Masha’s video on alpha bracelets here.
- To switch colours from row to row, you can either pull the leading thread colour to the spot or tie in a fresh thread as per the alpha method.
- I preferred to pull the thread from row to row each time it appeared, to create fewer stubs, unless the rows were too far.
- The middle section of the Singapore breakdown graphic was useful for me to see where each colour starts and ends. Once a colour ends I can safely cut it off completely.
- Tip: Although I didn’t see this in any of the tutorials, I found it useful when switching rows between the same colour, to skip one knot on the upper row. That means when I am on the last knot in row A that goes forward, instead of doing a forward-backward knot, I just do a forward knot, then continue to row B. This helps to make the edge straighter, otherwise there is an extra bump. When switching rows between different colours, this is not necessary.
- Once all the rows are done, make the red triangle end.
- Finish off the bracelet with twisted ties on both ends. Here’s Masha’s video to show how.
- Cut off excess thread at the back.
- When cutting off the excess thread, I tried to organise and tie them in such a way they they help to secure each other down and inwards, so they don’t peek out when worn.

Congratulations, you have completed your very own friendship bracelet!!!

Other prototype versions:
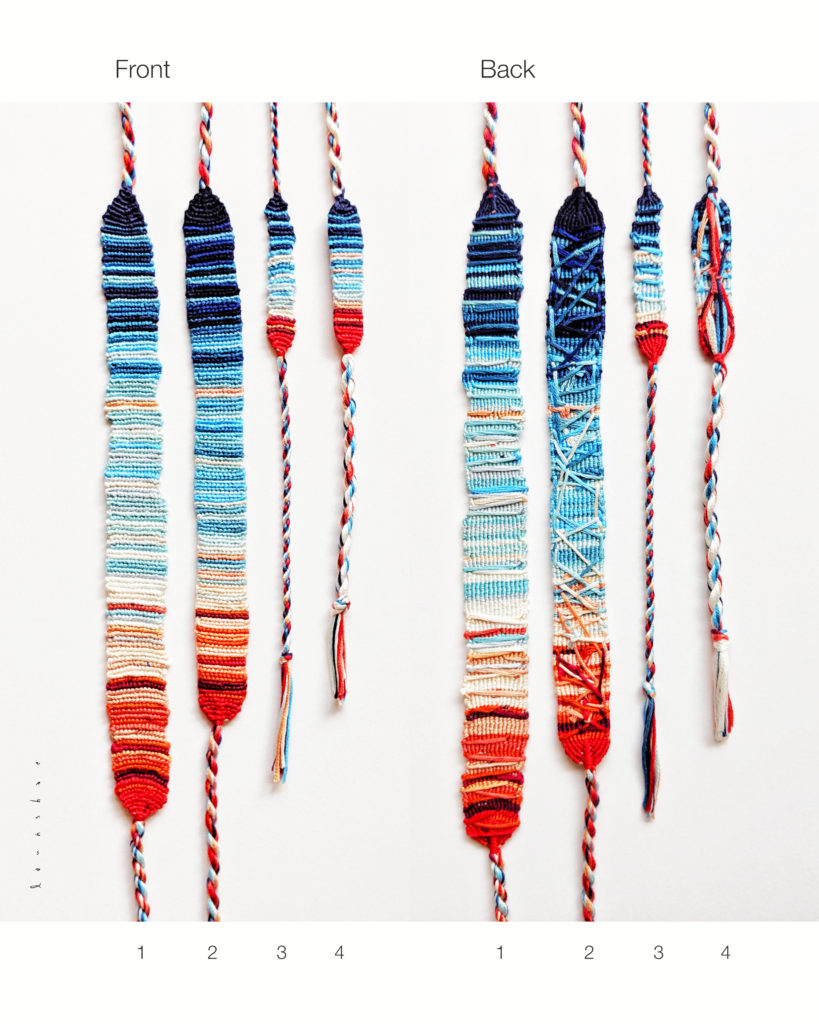
Below was my first attempt at making the friendship bracelet, the sides were more jagged because a different unorthodox method was used, where there were no base threads, only leading threads cannibalising themselves:


And here was another prototype of a mini version using 30 instead of 118 rows and 8 instead of 16 colours. The method was the same, only using a smaller dataset. Link to Google sheet:


More photos in this Facebook album.
Apologies if this tutorial is not comprehensive enough, I was focussed on making the prototype and now wish I had documented more of the steps. Anyhow please let us know if you have any thoughts or suggestions, and please share if you do make a bracelet of your own we would love to see! 🙂
#showyourstripes